|
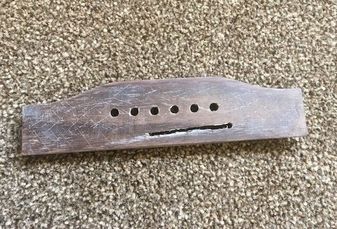
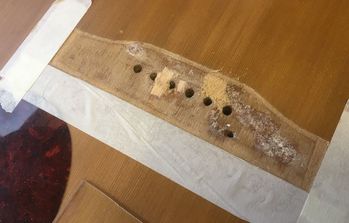
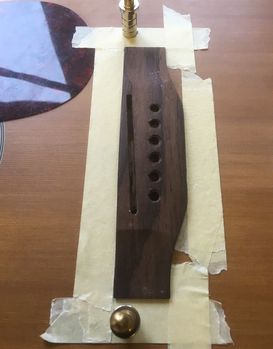
A not uncommon mishap that can befall an acoustic guitar is where the bridge becomes loose, or even snaps completely away from the body. When tuned to pitch terrific string tension pulls on the guitar top and bridge and so it is essential that there is a strong glue joint between these components. There are a number of reasons that a bridge can come loose on an acoustic guitar - an improper or poor glue joint, low humidity or heat, loose braces or other structural issues inside the guitar putting undue strain on the bridge, or a combination of these. Typically a bridge will come loose along the back edge, forming a gap between the guitar top and the bottom of the bridge. This may be difficult to see and not obvious so a good way of testing to see whether there is any gap under the bridge is to try and slide the flap of a guitar string packet underneath. This will determine the extent to which the bridge is loose. If the bridge is loose it is usually preferable to have it carefully removed ( I use heat blankets specially designed for this job) and have it re-glued properly, rather that running the risk of the bridge suddenly giving way under string tension and damaging the top in the process. In the example below, the bridge snapped clean away from the top, taking chunks of the spruce top fibres away with it. Here's how I fixed it. The old glue and fibres left on the bottom of the bridge are carefully scraped off so that a clean gluing surface remains. You can clearly see a ledge all around the perimeter of the bridge where no glue was applied during manufacture (quite common on lower end, and less expensive, acoustics). This lessens the overall gluing surface and makes the joint weaker than if the whole bridge was glued down.
A big lump of spruce stuck to the bottom of the bridge was removed and used to patch the top in its original position between the G and B string holes. Luckily the damage caused when the bridge came away wasn't too severe in this case, it could have been worse. Here the spruce patch is glued and clamped, and the result.
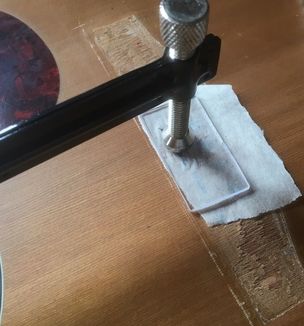
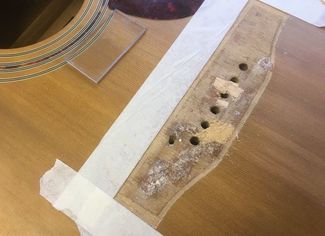
The footprint of where the bridge sat on the top shows a ledge of lacquer around the perimeter. The lacquer is carefully removed to provide for full contact with the bridge, and a flat and even surface when the bridge is glued back down. All the old glue is removed from the top and any remaining gaps in the spruce filled or patched and then sanded flat to create a level gluing surface.
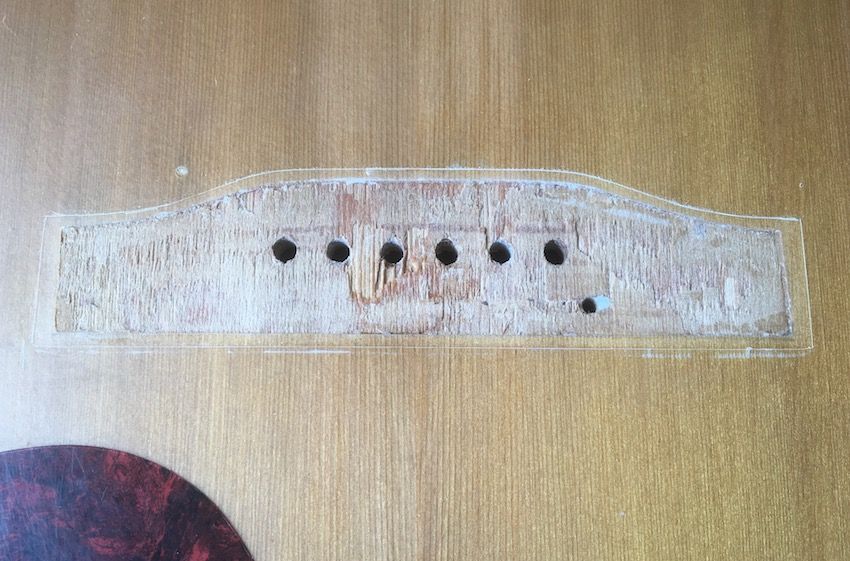
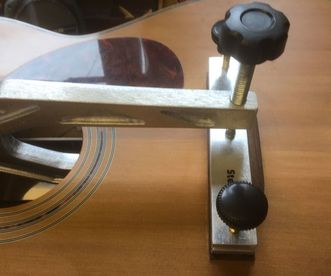
Bridge footprint with lacquer removed and holes filled, ready to be finally sanded and scraped flat in preparation for gluing. The bridge is located in the correct position and held in place, ready to be glued and clamped. When the bridge is clamped, a caul has to be custom made to go inside the guitar and over the top braces to protect the delicate top from the strong clamping pressure, by spreading the load. Any glue squeeze out from clamping is cleaned up before the glue drys.
The guitar is left clamped overnight for the glue to dry. Any remnants of dried glue in the bridge pin holes are then cleaned out. The guitar is ideally left for another day or two before stringing up to pitch. The bridge transfers the vibrations of the string through the top so good coupling between these elements has the added benefit of improving the tone of the guitar. Job done! 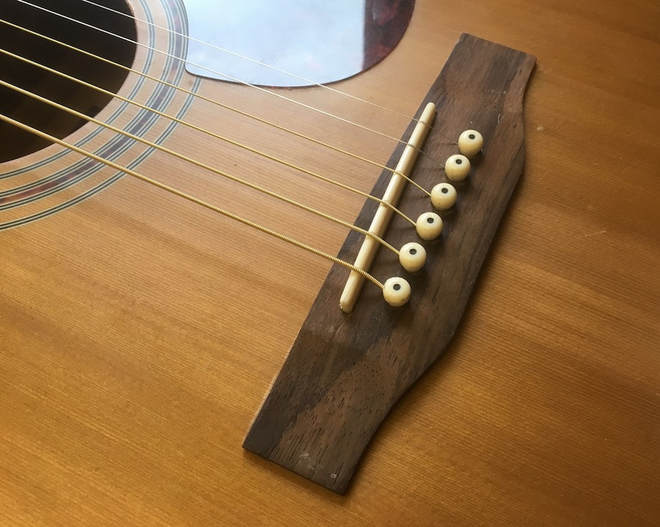 Comments are closed.
|
AuthorAs a luthier, and also a vintage guitar enthusiast, I'll be posting articles about guitar repair, guitar construction, and also vintage instruments Archives
December 2022
Categories |
| About | |

 RSS Feed
Menu |
Contact"The Engine Room"
Flax Drayton Farm Drayton South Petherton Somerset TA13 5LR Telephone: 07732 074088 Email: [email protected] |
© COPYRIGHT 2017. ALL RIGHTS RESERVED.
|